How to Install Solar Panels in Florida: The Complete Guide
In the Sunshine State, where golden rays and blue skies reign supreme, the concept of harnessing the sun’s energy to power your home has gained significant traction. Welcome to the complete guide on how to install solar panels in Florida. Whether you’re looking to save on energy bills, reduce your carbon footprint, or simply embrace a greener lifestyle, this guide is your roadmap to a successful solar panel installation journey.
Solar Panel Installation Cost in Florida
Before you embark on your solar journey, it’s essential to understand the financial landscape. The cost of solar panel installation can vary based on a multitude of factors, including system size, panel type, and installation complexity. On average, a 6 kW solar panel system in Florida falls within the range of $12,000 to $20,000. While the initial investment may seem substantial, keep in mind the long-term savings and environmental benefits that lie ahead.
Installing solar panels is like planting seeds of savings that will bear fruit for years to come. The payback period, typically around 5 to 7 years, marks the moment your panels start generating savings equivalent to their cost. Over a 25-year lifespan, you could save thousands of dollars on energy bills.
Imagine this journey as a treasure hunt, where every incentive and discount is a hidden gem waiting to be discovered. The federal government offers a generous 30% tax credit on the installation cost. In Florida, you’ll find additional rebates and net metering, allowing you to earn credits for excess energy you contribute to the grid. It’s like being rewarded for your commitment to a sustainable future.
Solar Panel Installation Tips

Installing solar panels is like customizing a puzzle – each piece must fit perfectly for the full picture to emerge.
Here’s how to piece it together:
Location: Imagine solar panels are sun-soaking enthusiasts. To maximize their energy absorption, place them on a roof or area that receives ample sunlight throughout the day. Avoid shading from trees or buildings.
Type: Think of solar panel types as different tools for a job. Monocrystalline panels are like precision instruments – efficient but costly. Polycrystalline panels are the multitools – cost-effective and reliable. Thin-film panels are like flexible solutions – perfect for unconventional spaces.
Size: Calculate your average monthly kWh usage and match it with a panel system that can generate a similar amount.
Roof Mount: Roof mount panels are integrated into your roof’s design. However, installation is complex and may require adjustments if you’re planning renovations.
Ground Mount: Ground mount panels are placed on the ground, optimizing sunlight exposure. They’re great if your roof isn’t suitable or you have ample outdoor space. Just ensure your yard has the right orientation and isn’t shaded.
Tracking Mount: Tracking mount panels follow the sun’s path for maximum efficiency. While they boost energy generation, they’re more expensive and maintenance-heavy.
Energy Needs: Calculating energy needs is very important. Check your utility bills to understand your average monthly energy consumption in kWh. This helps you gauge the size of the solar panel system required.
Sunshine Hours: Research your area’s average daily sunshine hours to estimate monthly potential. Multiply daily hours by 30 for a rough monthly estimate.
Solar Panel Installation Process
Let’s break down the process of installing solar panels:
Step 1: Planning and Design
- Site Assessment: Assess your roof’s condition, orientation, and shading. If using ground mounts, choose an area with optimal sunlight.
- System Sizing: Like a tailor measuring for a suit, calculate your system size. Based on your energy needs, determine the number of panels required.
Step 2: Gathering Materials and Tools
- Solar Panels
- Mounting System
- Inverters: They convert solar energy into usable electricity.
- Wiring and Connectors
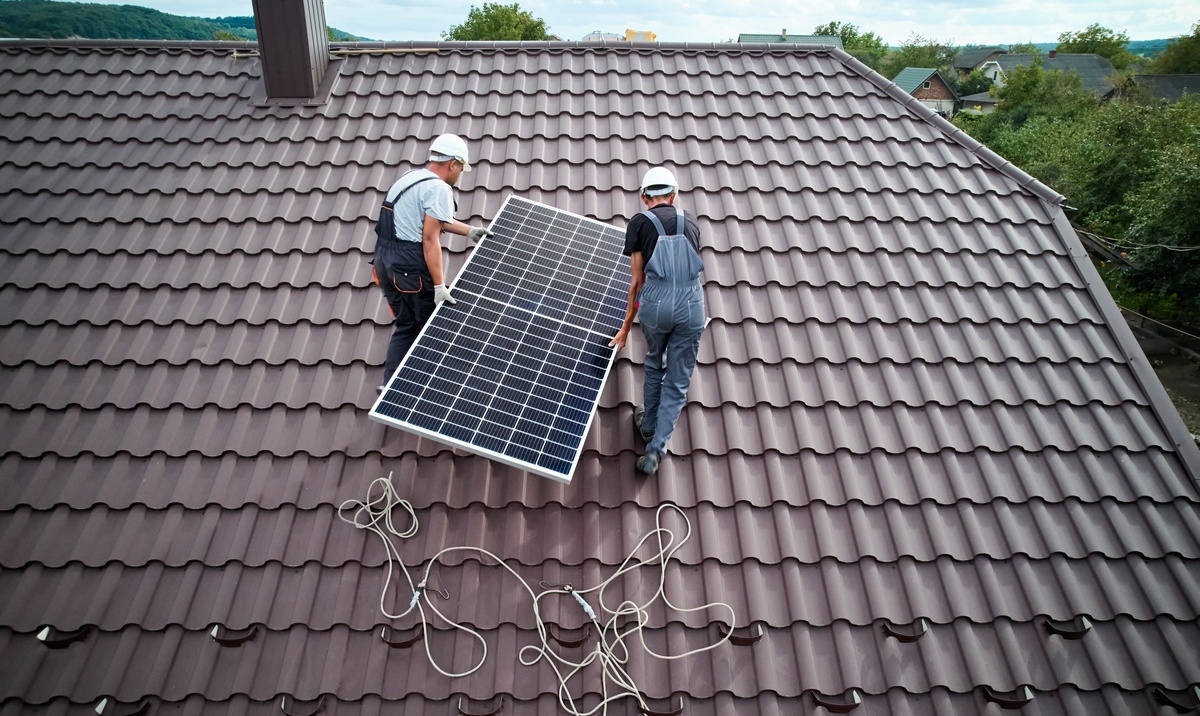
Step 3: Installation
- Mounting
- Wiring
- Inverter Installation
Step 4: Connection to the Grid
- Net Metering: Net metering is like a two-way street – excess energy goes back to the grid, and you get credit for it.
- Grid Connection
Step 5: Testing and Maintenance
- System Testing: ensure all components are working correctly.
- Maintenance: keep panels clean and inspect for damage regularly.
Best Practices and Tips
- Safety First: wear safety gear, avoid slippery roofs, and be cautious around electrical components.
- Professional Help: Consider hiring a professional installer or electrician. They ensure proper installation, wiring, and compliance with regulations.
- Panel Cleaning: keep them dirt-free for optimal energy production.
- Monitoring: Helps you keep track of energy generation and consumption.
Solar Panel Installation Safety

Installing solar panels is exciting, but safety should be your guiding star. Imagine it’s a DIY project that comes with great responsibility.
Safety Rules and Precautions
- Safety Gear: Wear gloves, safety glasses, and non-slip shoes.
- Turn Off Electricity: Before touching anything, turn off the power
- Stay Clear of Live Wires: keep your distance and never touch them.
- Avoid Wet Conditions: Rain and electricity don’t mix – keep the area dry and non-slip.
- Ladder Safety: If using a ladder, ensure it is sturdy and placed on level ground.
- Secure Tools: keep them organized, secured, and away from edges.
Potential Hazards and Risks
- Electric Shock: Avoid touching live wires and always wear protective gear.
- Falls: Secure ladders, wear proper footwear, and use safety harnesses if necessary.
- Heavy Equipment: improper handling can strain your muscles or cause accidents. Lift with your legs, not your back.
- Roof Hazards: Roofs can be slippery like ice – be cautious when walking, and secure yourself with safety lines if needed.
Avoiding Injury and Damage
- Plan Ahead: Plan your installation – know the steps, materials, and potential challenges in advance.
- Work in Pairs: having someone to assist increases safety.
- Follow Instructions: they guide you to success and safety.
- Proper Wiring: make sure all the wiring is properly insulated and protected from damage.
- Secure Panels: ensure they’re installed securely to prevent displacement.
Features and Safety Standards
- Certifications: Look for panels with certifications like UL or IEC – they ensure safety and quality.
- Rapid Shutdown: Think of this as an emergency brake – it quickly de-energizes panels during maintenance or emergencies.
- Fire Safety: Consider fire-resistant panels
- Grounding: It directs excess electricity harmlessly into the ground.
Installing solar panels requires skill, care, and a strong focus on safety. Just as an artist protects their hands and eyes, you must protect yourself from potential hazards. Remember, safety isn’t just a rule; it’s a way of life during solar panel installation.
Solar Panel Installation Benefits

Imagine your solar journey as a bridge connecting your home to a greener future. Installing solar panels brings a cascade of benefits:
Lower Energy Bills and a Reduced Carbon Footprint
It’s like grabbing the best of both worlds and relishing every moment – lower energy bills and a smaller carbon footprint. Your panels are like miniature power plants, generating electricity from a clean and renewable source.
Enhanced Home Value and Revenue Generation
Installing solar panels adds value to your home. Plus, excess energy you generate can be sold back to the grid, earning you money.
Environmental and Social Goodies
Consider your solar journey as an opportunity to make a positive impact on the environment and society. You will become a superhero fighting carbon emissions and inspiring others to follow your example.
Ready to Embrace the Solar Lifestyle? Contact Flare Experience!
Your journey is like setting sail on uncharted waters. Let us be your compass. Flare Experience is here to guide you every step of the way. From choosing the perfect panels to expert installation, we’ve got you covered.
Contact us now, and let’s illuminate your Florida home with solar power!
How to Install Solar Panels FAQs
Can I install a solar panel system myself?
While some DIY projects are fun and don’t require previous experience, solar panel installation requires expertise.
How do you install solar panels step by step?
- Planning: Decide the installation location and gather required permits.
- Roof Assessment: Examine the roof’s condition and orientation for optimal sunlight.
- Mounting: Install racking or mounts securely on the roof.
- Attach Panels: Fix panels to mounts, ensuring proper alignment.
- Wiring: Connect panels in series or parallel to form an array.
- Inverter Installation: Install the inverter, connecting it to the panels and the grid.
- Electrical Connection: Wire the inverter to your home’s electrical system.
- Inspection: Have the system inspected to ensure safety and compliance.
- Final Connection: Get utility approval and connect to the grid.
- Enjoy Savings: Start generating clean energy and enjoying lower bills.
How should solar panels be installed?
Solar panels should be securely mounted on a structurally sound surface, preferably facing south for maximum sunlight exposure. They need proper spacing to prevent shading and should be tilted at an angle that matches your region’s latitude for optimal energy generation. Proper wiring, grounding, and connections to inverters and the grid are crucial for a successful installation.
How do you connect solar panels to your house?
Connect solar panels to your house by wiring them to an inverter that converts the DC energy they produce into AC energy usable by your home. This energy is then fed into your house’s electrical system through a breaker panel, providing power for your appliances and reducing your reliance on the grid.
How many solar panels does it take to run a house?
The number of solar panels needed to power a house varies based on factors like energy consumption, panel efficiency, and location. On average, a typical residential home might require a solar panel system ranging from 20 to 30 panels, each with a capacity of around 300 watts. It’s best to calculate your specific needs with a solar professional.
Can 1 solar panel power a whole house?
No, one solar panel typically cannot power an entire house. A single panel generates a limited amount of energy, and a house requires a larger system to meet its energy needs consistently.